

How to Put In Clip-In Extensions: A Step-by-Step Guide for Beginners

Key Takeaways
- The key to how to put in clip in extensions naturally is beginning with a clean section about 1–2 inches above the nape. Use the largest weft (3–4 clips) at the base and layer smaller wefts on top of it. Each section should be about an inch apart for even, hidden placement.
- Knowing where to put clip in hair extensions on the sides is essential—place 1- or 2-clip wefts about 2 inches above your ears, angled slightly back for a flat, secure fit. This creates volume around the face without visible clips near the hairline.
- After putting in clip in hair extensions, always blend your natural hair with the extensions using a brush or hot tools. Curl or straighten them together for a seamless texture match, and avoid brushing over the clips to keep everything secure.
What Are Clip-In Hair Extensions?
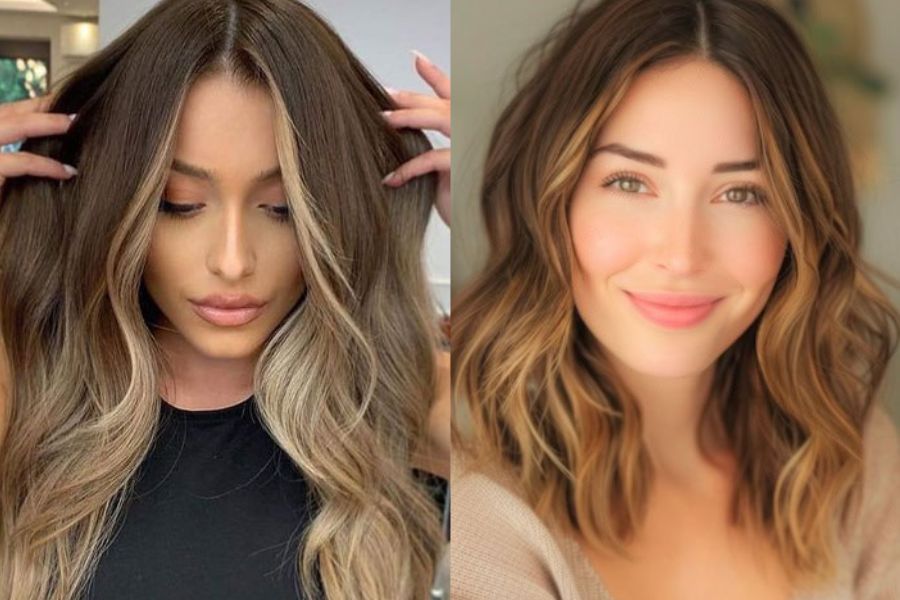
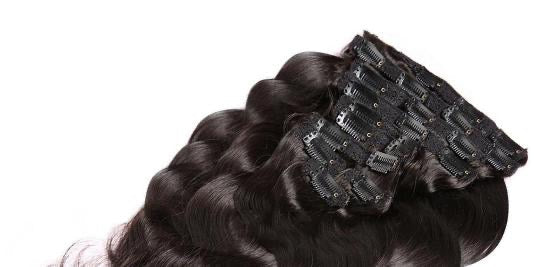
Clip-in extensions are wefts of real or synthetic hair with small pressure-sensitive clips attached at the top. These clips easily snap open and shut, allowing you to attach the extensions securely and comfortably to your natural hair. No glue, heat, or long-term commitment needed.

They’re a great option if you want to:
- Add volume to thin or flat hair – Perfect for creating that full, bouncy look you see in magazines
- Try a longer hairstyle without waiting months for growth – Go from bob to mermaid hair instantly
- Experiment with highlights or new colors – Test drive different shades without permanent commitment
- Style up for a special occasion – Wedding, date night, or photoshoot ready in minutes
- Protect your natural hair – Give your hair a break from daily styling while still looking fabulous
How to Put In Clip-In Extensions
Before we dive into how to install clip-in hair extensions, let's gather all the essentials. Having everything ready will make the process much smoother and faster.
First, you’ll need to prepare:
- A full set of clip-in extensions (preferably 100% Remy human hair for the most natural look and longest-lasting results)
- A rat-tail comb for creating clean, precise sections
- Hair clips or clamps to hold your natural hair out of the way
- A soft brush or wide-tooth comb for gentle blending
- A handheld mirror to check the back of your head
Other optional tools:
- A curling wand or flat iron to blend textures
- Dry shampoo or texturizing spray for extra grip
- Heat protectant spray if you plan to style with heat tools
If you don't already have a high-quality set, consider Livicor Hair's Clip-In Extensions Collection, offering salon-quality options in a variety of colors, lengths, and textures that perfectly match your hair.
Now, let's walk through the complete process of putting in clip in hair extensions properly. This method works for both straight and wavy extensions, and once you master the technique, it should only take about 10–15 minutes.
Step 1: Prep and Brush Your Hair
Start with dry, clean hair as wet hair won't hold the clips securely. Brush your hair thoroughly from roots to ends to remove any tangles or knots. This step is crucial because tangled hair will prevent the extensions from lying flat and looking natural.
You can style your natural hair at this point if desired. If you want curls or waves, curl your hair first, then add the extensions and blend them in for a seamless look. For straight styles, you can add the extensions first and style everything together.

Pro tip: If your hair is freshly washed and feels slippery, spray some dry shampoo or texturizing spray at your roots for added volume. This provides the clips with a better grip, helping them stay secure throughout the day.
Step 2: Section the Bottom Layer
This is where many beginners make mistakes, so pay close attention to where to put clip in hair extensions first. Using the pointed end of your rat-tail comb, create a horizontal line across the back of your head, starting about one to two inches above the nape of your neck.
Clip all the hair above this line up and out of the way using your hair clamps. You should have a clean, horizontal section of hair exposed at the base of your head.
Take your largest weft (usually a 3 or 4-clip piece) and gently tease the roots of your natural hair in this section if needed. This creates texture and grip for the clips.

Open the clips on your weft by pressing the hinged part. Position the center clip first, directly in the middle of your sectioned hair, approximately a quarter-inch away from your scalp. Press down firmly until you hear it click shut. Then secure the side clips evenly to the left and right, making sure they're snug against your scalp.
Step 3: Work Your Way Up Layer by Layer
Release another horizontal section of hair about one inch above your first weft. The key to natural-looking extensions is proper layering, each row should be evenly spaced and well-hidden under your natural hair.
Install your next largest weft using the same technique: center clip first, then the sides. Ensure each clip is firmly attached and sits flat against your head.
Continue this process, working your way up the back of your head. Most clip-in sets come with 6-8 wefts of varying sizes, allowing you to create 3-4 layers in the back section, typically.
Important: Never place wefts too close to your crown or hairline where they might be visible. Keep them hidden under your top layers of natural hair.
Step 4: Add Side Pieces for Fuller Coverage
Now let's focus on the sides of your head. Create horizontal sections above your ears, starting approximately two inches above your ear. These sections should connect seamlessly with your back sections.
Use your smaller wefts (typically 1 or 2-clip pieces) for the sides. These areas require more delicate placement since the hair is often thinner here.
Placement tip: Angle the side wefts slightly backward toward the back of your head. This helps them lay flat and prevents them from sticking out unnaturally.
Ensure the clips are well-hidden under your natural hair and not too close to your temples or hairline, where they may be visible.
Step 5: Blend and Style for Natural Results
Once all your extensions are securely in place, it's time for the magic of blending. Release all your natural hair and use your fingers or a soft brush to gently combine your hair with the extensions.
Start from the bottom and work your way up, being careful not to brush directly over the clips. Instead, brush through the hair itself, allowing your natural hair and extensions to meld together.
If there's a noticeable difference in texture between your natural hair and the extensions, now is the time to style them together. You can:
- Curl both your hair and extensions together for uniform waves
- Straighten everything for a sleek, polished look
- Add some texturizing spray for a more tousled, natural finish

If you're using Livicor Hair’s 100% Remy human hair extensions, you can treat them exactly like your natural hair. Remember to use heat protectants and avoid over-styling to maintain their quality.
How Often Should You Wear Clip-In Extensions?
Clip-ins are perfect for occasional use, such as weekend outings, events, or even everyday wear as long as you care for them properly. You can install them in the morning and remove them in minutes at night.
And since you’re not bonding or taping anything permanently, you can switch up your look as often as you like.


Comments